
Adjusting placement of the anchors on the rail. Original placement didn't line up with the joists.
The pre-drilled holes for the 4 brackets are spaced evenly, but don't line up with the joists. I didn't want to rely on hollow wall anchors or toggle bolts to hold the brackets for a door in the ceiling.
I am drilling new holes on the back side of the rail. which will become the new front of the rail Two of the pre-drilled holes in the new back will be visible from inside the bathroom, but I will plug them for a more finished look.
I did manage to get 2 of the 4 holes drilled in proper alignment on the first try. The other two holes had to be lengthened using a Dremel tool with a grinding bit.
Capture Date: Apr 6, 2018 08:48 PM•Views: 128
No comments yet. All fields are required, fill in the form. Comment successfully added. Comment
|
Making sure the anchoring bolt will fit into the new hole.
There is a short metal cylinder inside the steel rail, with a hole through it drilled and tapped for the M8 x 1.25 bolt. A nice clean look.
Capture Date: Apr 6, 2018 09:02 PM•Views: 115
No comments yet. All fields are required, fill in the form. Comment successfully added. Comment
|
Rail mounted securely to ceiling and leveled with wood shims.Capture Date: Apr 6, 2018 10:53 PM•Views: 116No comments yet. All fields are required, fill in the form. Comment successfully added. Comment
|
Figuring out where to put the rollers using a test panel. I have only 1/4 inch clearance.
This kit comes with incorrect measurements in the instructions, and previous reviewers have had to redrill and patch their doors. Best to take a board and drill candidate holes and run the board back and forth to make sure the rollers are in a good spot.
The spacing from the left edge of the door will allow the door to reach the wall if the curtain rail is cut. A fancy stopper supplied with the rail is partly off the left edge of the photo, and is attached to the rail to prevent it from getting lost. If the rail is cut, this will stop the door just before it touches the wall.
Capture Date: Apr 7, 2018 11:48 AM•Views: 120
No comments yet. All fields are required, fill in the form. Comment successfully added. Comment
|
Measurements checked 3 times, time to drill the 8mm diameter holes in the header panel.
Drilling over the melamine roller test panel to prevent tearing of the veneer on the back side.
Capture Date: Apr 7, 2018 12:14 PM•Views: 109
No comments yet. All fields are required, fill in the form. Comment successfully added. Comment
|
Putting rollers on to header panel. Needed shorter 8mm flat head screws.
The header panel is thinner than most standard doors, so I had to get shorter 8mm x 1.25 bolts.
Capture Date: Apr 7, 2018 12:17 PM•Views: 119
No comments yet. All fields are required, fill in the form. Comment successfully added. Comment
|
Door hung! Fits perfectly top/bottom. Doesn't roll on its own.Capture Date: Apr 7, 2018 12:21 PM•Views: 107No comments yet. All fields are required, fill in the form. Comment successfully added. Comment
|
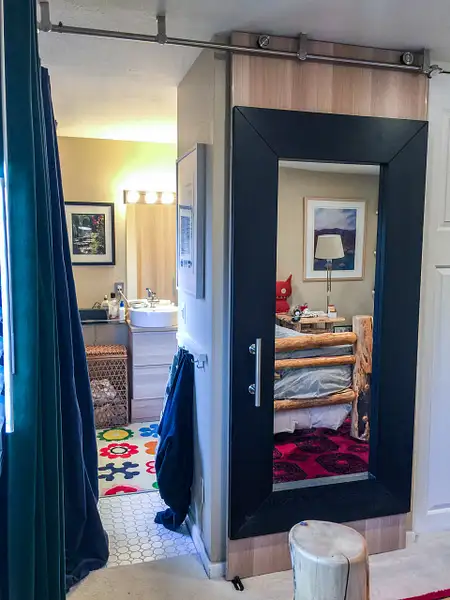
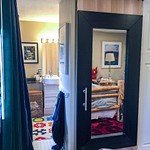
Door slid shut, even gaps at ceiling and floor.Capture Date: Apr 7, 2018 12:21 PM•Views: 129No comments yet. All fields are required, fill in the form. Comment successfully added. Comment
|
Left to hang on its own, the door's lower edge leans out. I figured this would happen.Capture Date: Apr 7, 2018 12:22 PM•Views: 114No comments yet. All fields are required, fill in the form. Comment successfully added. Comment
|
II ordered this roller from Amazon, with two adjustable rollers.Capture Date: Apr 7, 2018 12:38 PM•Views: 133No comments yet. All fields are required, fill in the form. Comment successfully added. Comment
|
Roller bracket screwed to wall, door now is perfectly vertical and slides smoothly.Capture Date: Apr 7, 2018 12:50 PM•Views: 107No comments yet. All fields are required, fill in the form. Comment successfully added. Comment
|
The floor roller isn't too obtrusive.Capture Date: Apr 7, 2018 12:51 PM•Views: 119No comments yet. All fields are required, fill in the form. Comment successfully added. Comment
|
Ooops! I forgot to cut the right end of the rail off to clear the bifold closet doors.
I actually didn't think about this until I had gotten this far. Happily it is easy to roll the door off the rail and 8 screws take the rail off the brackets.
Capture Date: Apr 7, 2018 12:52 PM•Views: 113
No comments yet. All fields are required, fill in the form. Comment successfully added. Comment
|
Using a tubing cutter to make a clean cut in the steel rail. Oil helps cool the cutting wheel.Capture Date: Apr 7, 2018 04:41 PM•Views: 106No comments yet. All fields are required, fill in the form. Comment successfully added. Comment
|
Many many turns around the rail, tightening the cutting wheel just a bit each time. Smooth cut!Capture Date: Apr 7, 2018 04:49 PM•Views: 111No comments yet. All fields are required, fill in the form. Comment successfully added. Comment
|


No comments yet...
All fields are required, fill in the form.
Comment successfully added.
Comment